Flows step-by-step tutorial
Build a complete image-to-film pipeline from scratch.
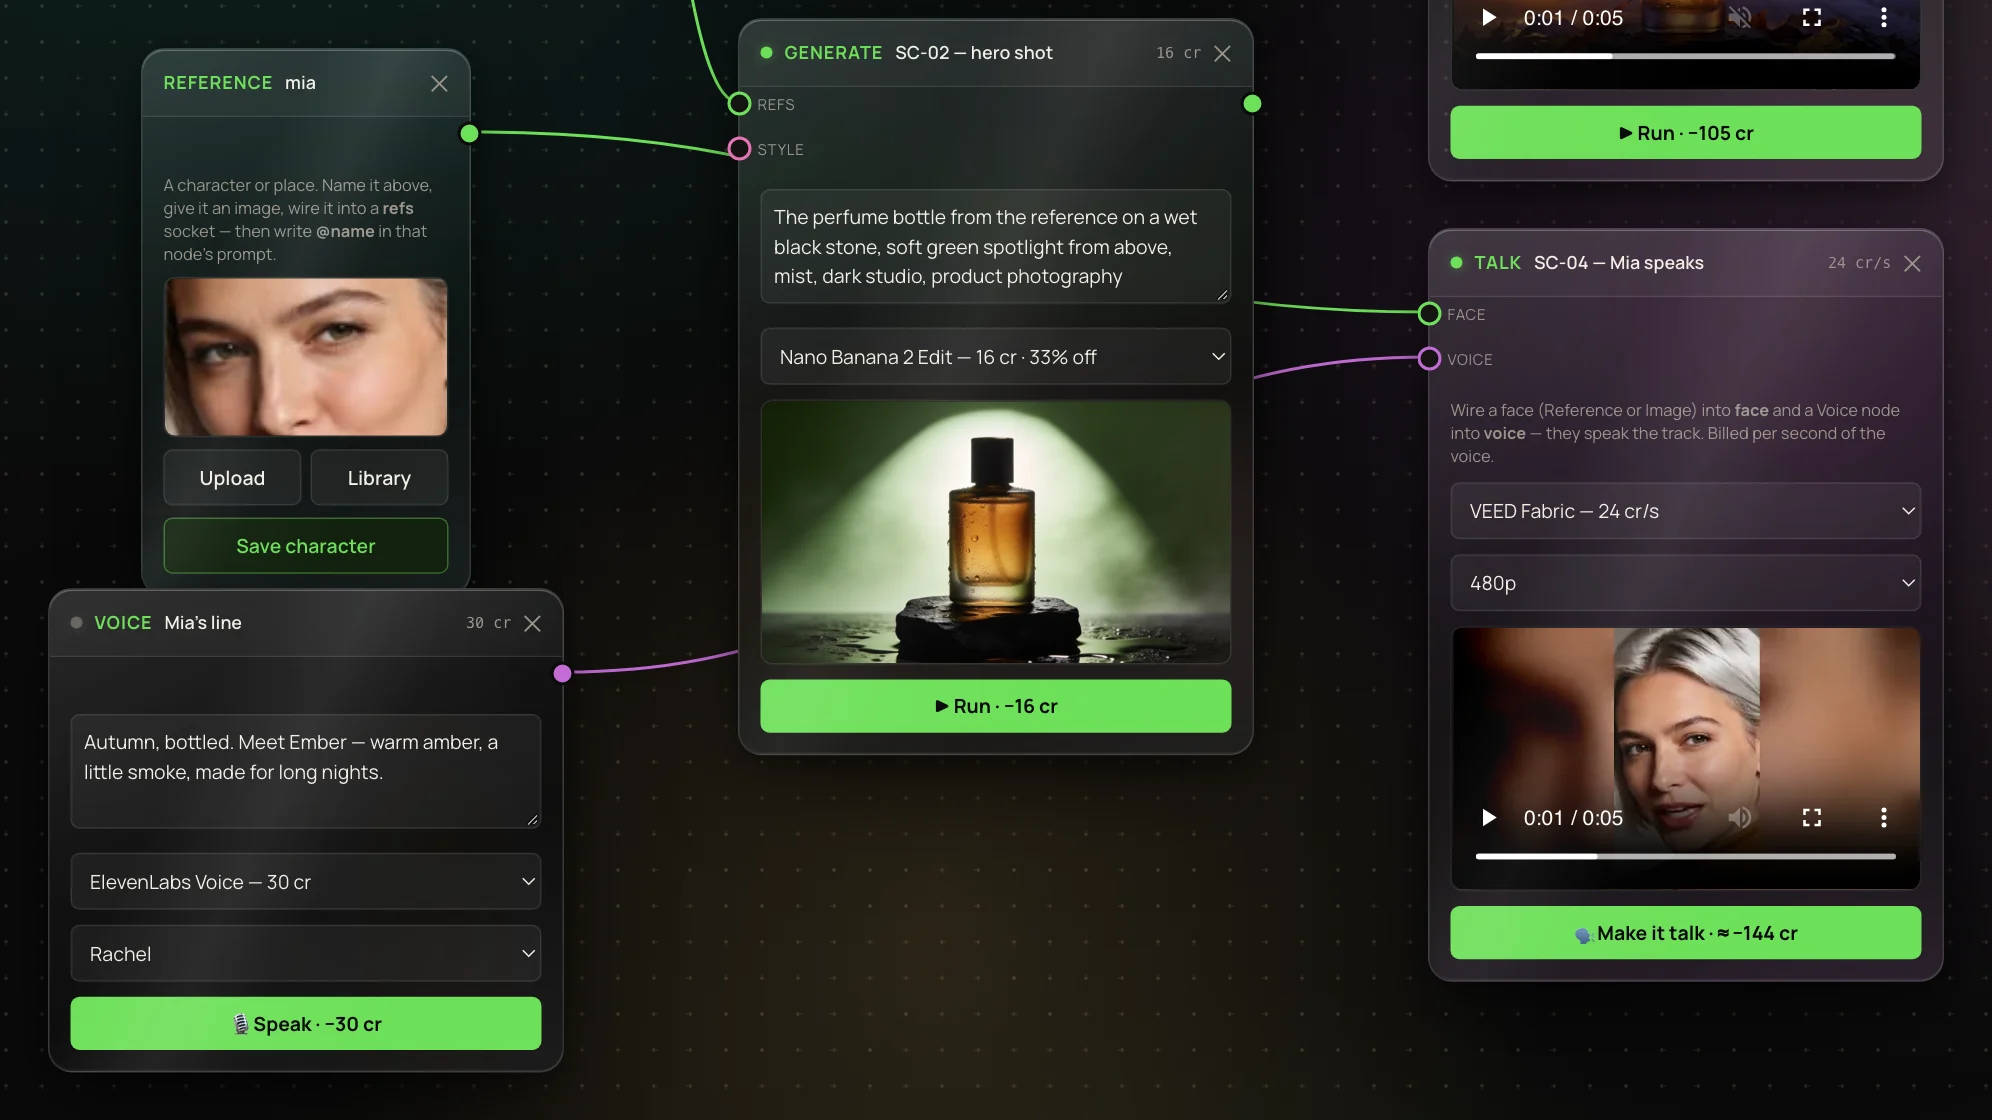
In this tutorial you build the flow below, one box at a time. A product photo becomes an autumn ad clip, and a presenter called Mia speaks a line about it. At the end you join both clips into one film. Along the way you use all seven boxes.
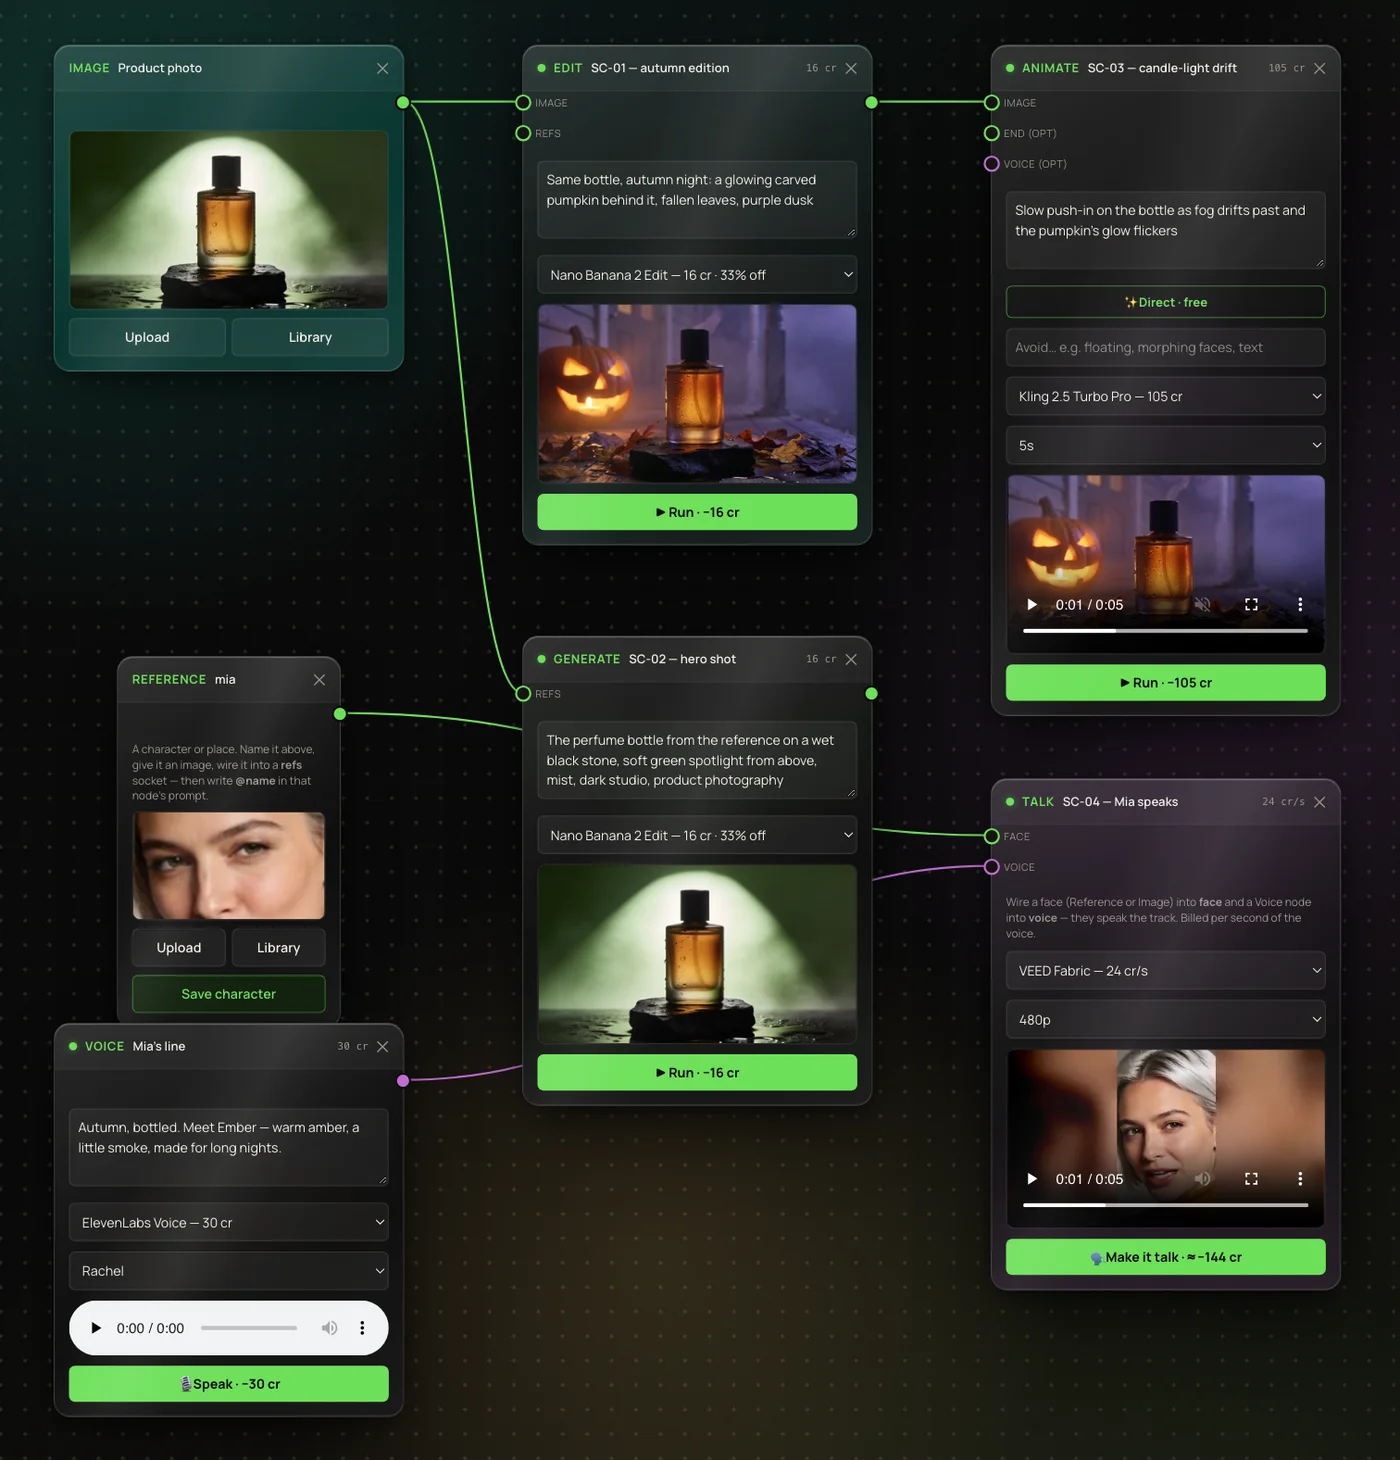
- You’ll need
- A photo of a product and a photo of a face. Pictures from your Library work too.
- Cost
- Only the boxes you run. Each box shows its price on its Run button; adding and wiring boxes is free.
The prompts below are the ones in the picture. Change the words to fit your own product.
1. Create the flow
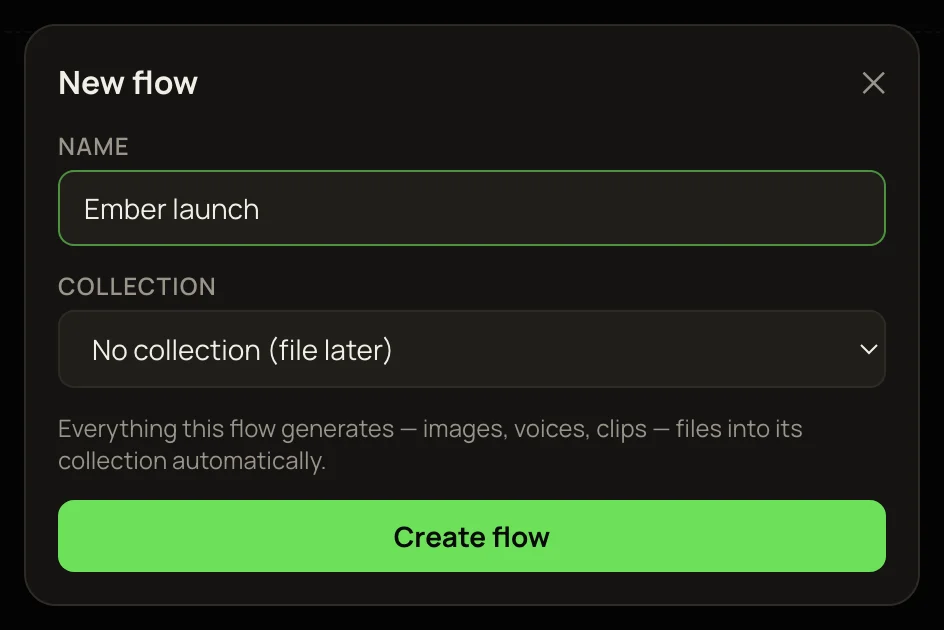
- 1Click Flow in the sidebar, then + New flow.
- 2Name it — say, Autumn ad.
- 3Under Collection, pick a collection, choose + New collection…, or leave No collection (file later).
- 4Click Create flow.
Everything this flow makes files into that collection in your Library — or under Not in a collection if you chose none. The flow saves itself as you work: the header shows its collection and the word autosaves.
2. Add your product photo
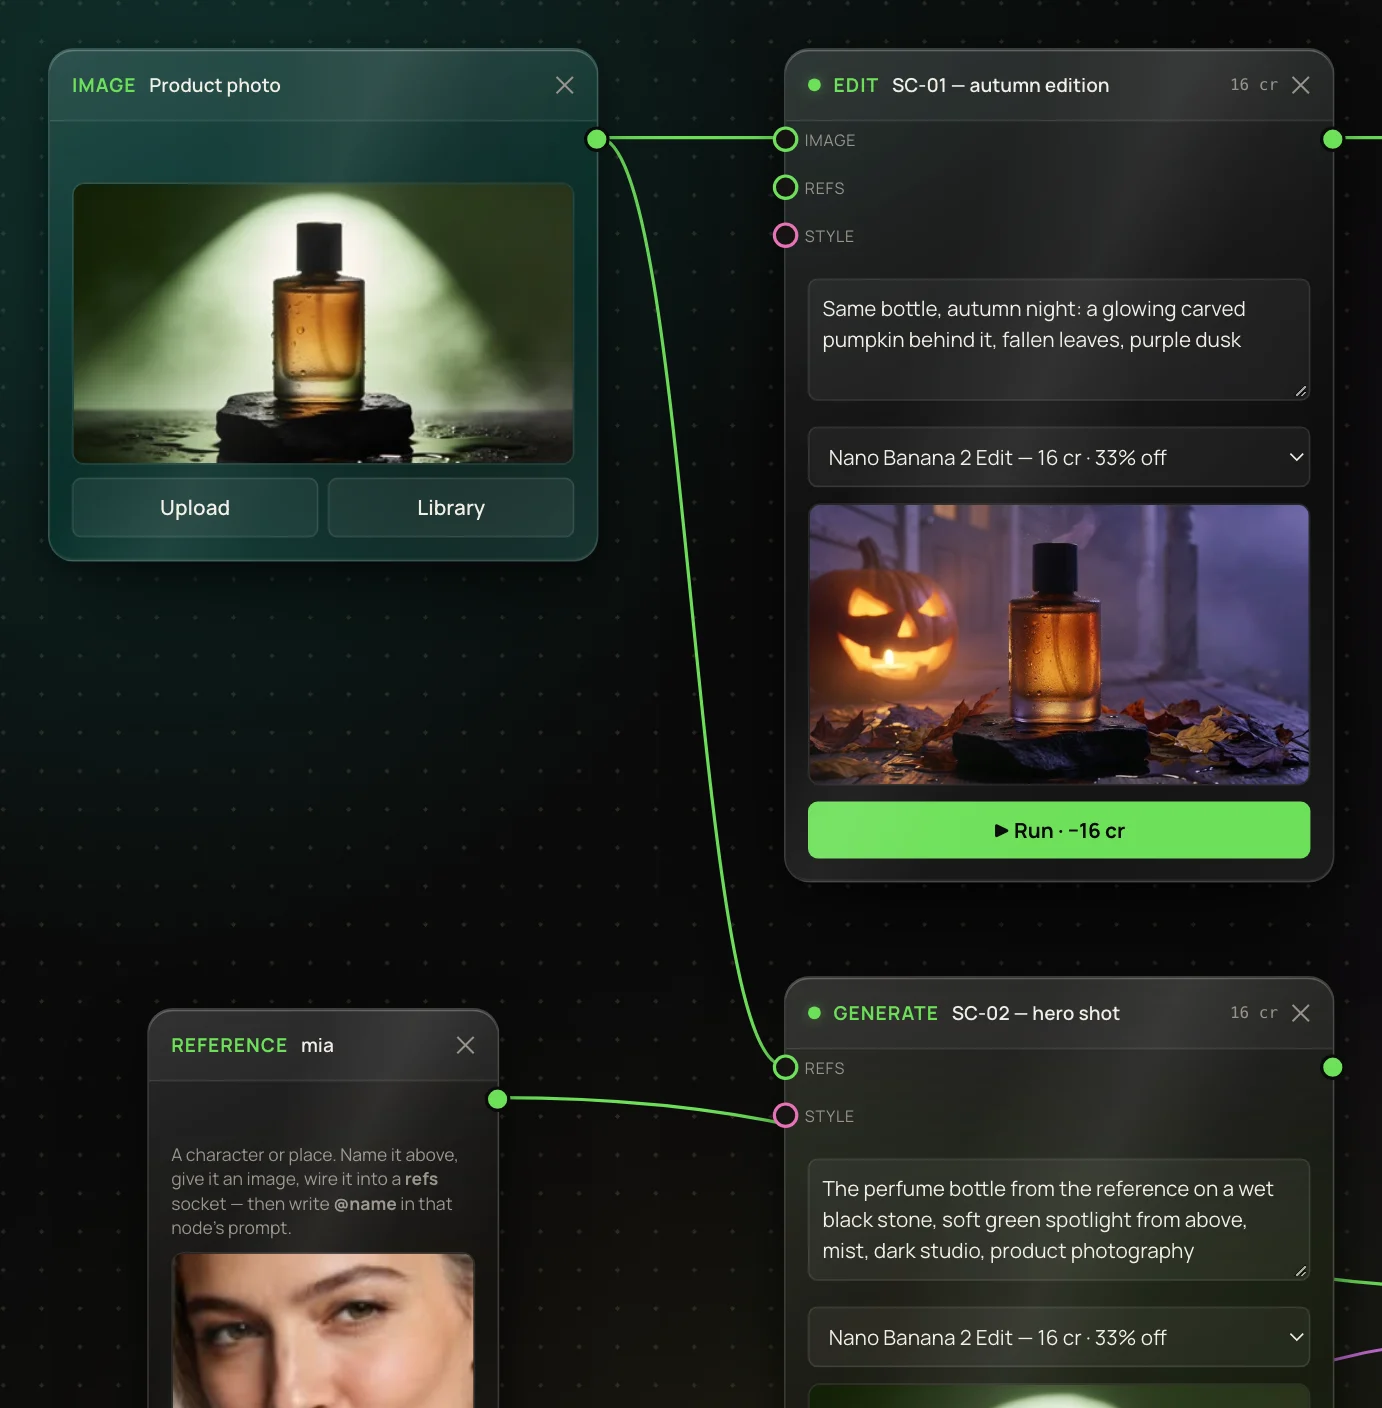
- 1In the Add node bar above the canvas, click Image.
- 2Click into the box’s header and type its name: Product photo.
- 3Click Upload to pick a file, or Library to choose a picture you’ve made.
The green dot on the box’s right edge is its output. Cables start there.
3. Change it with an Edit box
- 1Click Edit and name the new box SC-01 — autumn edition.
- 2Drag from the photo’s output dot to the Edit box’s image socket, and let go.
- 3Type the change on the box: “Same bottle, autumn night: a glowing carved pumpkin behind it, fallen leaves, purple dusk.”
- 4Press ▶ Run. The dot by the box’s name turns amber while it works, then green. The new picture appears in the box.
Cables come in two colors: green carries pictures and violet carries sound. Only matching colors connect. To remove a cable, click it.
4. Make a fresh shot that keeps the product
A Generate box makes a new picture from words. Wire your photo into its refs socket, and the product stays the same in the new shot.
- 1Click Generate and name it SC-02 — hero shot.
- 2Drag a second cable from the photo’s output dot to the Generate box’s refs socket. One output can feed many boxes.
- 3Type: “The perfume bottle from the reference on a wet black stone, soft green spotlight from above, mist, dark studio, product photography.”
- 4Press ▶ Run.
5. Animate the autumn shot
- 1Click Animate and name it SC-03 — candle-light drift.
- 2Wire the Edit box’s output into the Animate box’s image socket.
- 3Describe the motion: “Slow push-in on the bottle as fog drifts past and the pumpkin’s glow flickers.” Or type rough notes and press ✨ Direct · free — see below.
- 4Pick a model and a clip length. The price on ▶ Run changes with them.
- 5Press ▶ Run. Video takes longer than a picture; the box shows its progress, and the clip plays in the box when it’s done.
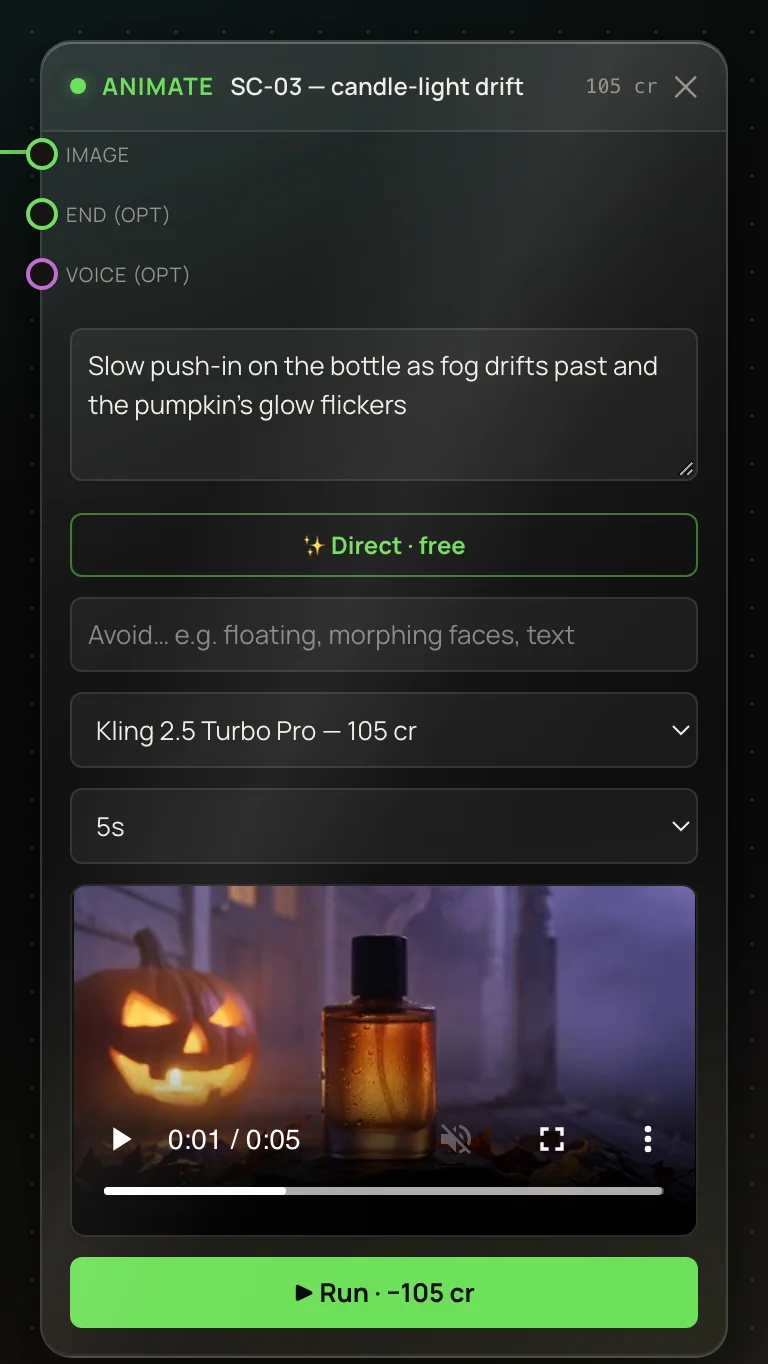
✨ Direct · free turns rough notes into a full motion prompt. An AI film director looks at your picture, rewrites your notes, and fills in the Avoid box. Press it again for another version.
Pressing is free — up to 25 times a day once you’ve bought credits, or 3 a day before that. When the box runs, its Run button adds + 9 ✨, charged once. If the clip fails, those credits come back too.
6. Add Mia, your presenter
- 1Click Reference. In its header, type the name mia.
- 2Give it a face with Upload or Library.
- 3Click Save character. The button changes to ✓ Saved.
Saving makes Mia a character you can use anywhere. Next time, skip the Reference box: type @ in any prompt and pick @mia from the list. When you click Library on an Image or Reference box, she is listed under Entities. More in Entities — characters, props, places, styles, scenes.
7. Give her a line
- 1Click Voice and name it Mia’s line.
- 2Type the script: “Autumn, bottled. Meet Ember — warm amber, a little smoke, made for long nights.”
- 3Pick a voice in the menu under the model.
- 4Press 🎙 Speak. Play the track in the box to hear it.
8. Make her talk
- 1Click Talk and name it SC-04 — Mia speaks.
- 2Wire the mia box into the Talk box’s face socket.
- 3Wire the Voice box into its voice socket — a violet cable.
- 4Press 🗣 Make it talk.
A talking clip is billed per second of the voice, and the voice can run up to 30 seconds. More in Making characters talk.
9. Render the film
- 1Check the order. The film plays clips from left to right, so the Animate box should sit further left than the Talk box.
- 2Click 🎞 Render film in the toolbar and confirm. Two clips cost 7 credits.
- 3Wait for the window to finish — usually under a minute. Keep the tab open.
- 4Play your film, then click Open / download MP4.
10. Change one thing, run one box
Now the flow is built, changes are cheap. Rewrite the Edit box’s prompt — “winter night, fresh snow” — and press its ▶ Run. Only that box charges. Then run the Animate box again and render a new film.
▶ Run all in the toolbar runs every box that hasn’t made a result yet — handy after you add boxes or load a recipe. It shows the total first. Boxes that don’t depend on each other run at the same time; a box waits for the boxes wired into it. If one fails, its credits come back and only the boxes that need it are skipped.