Entities — characters, props, places, styles, scenes, palettes
Save a face, product, place or look once, then call it by name in any prompt to keep it the same in every shot.
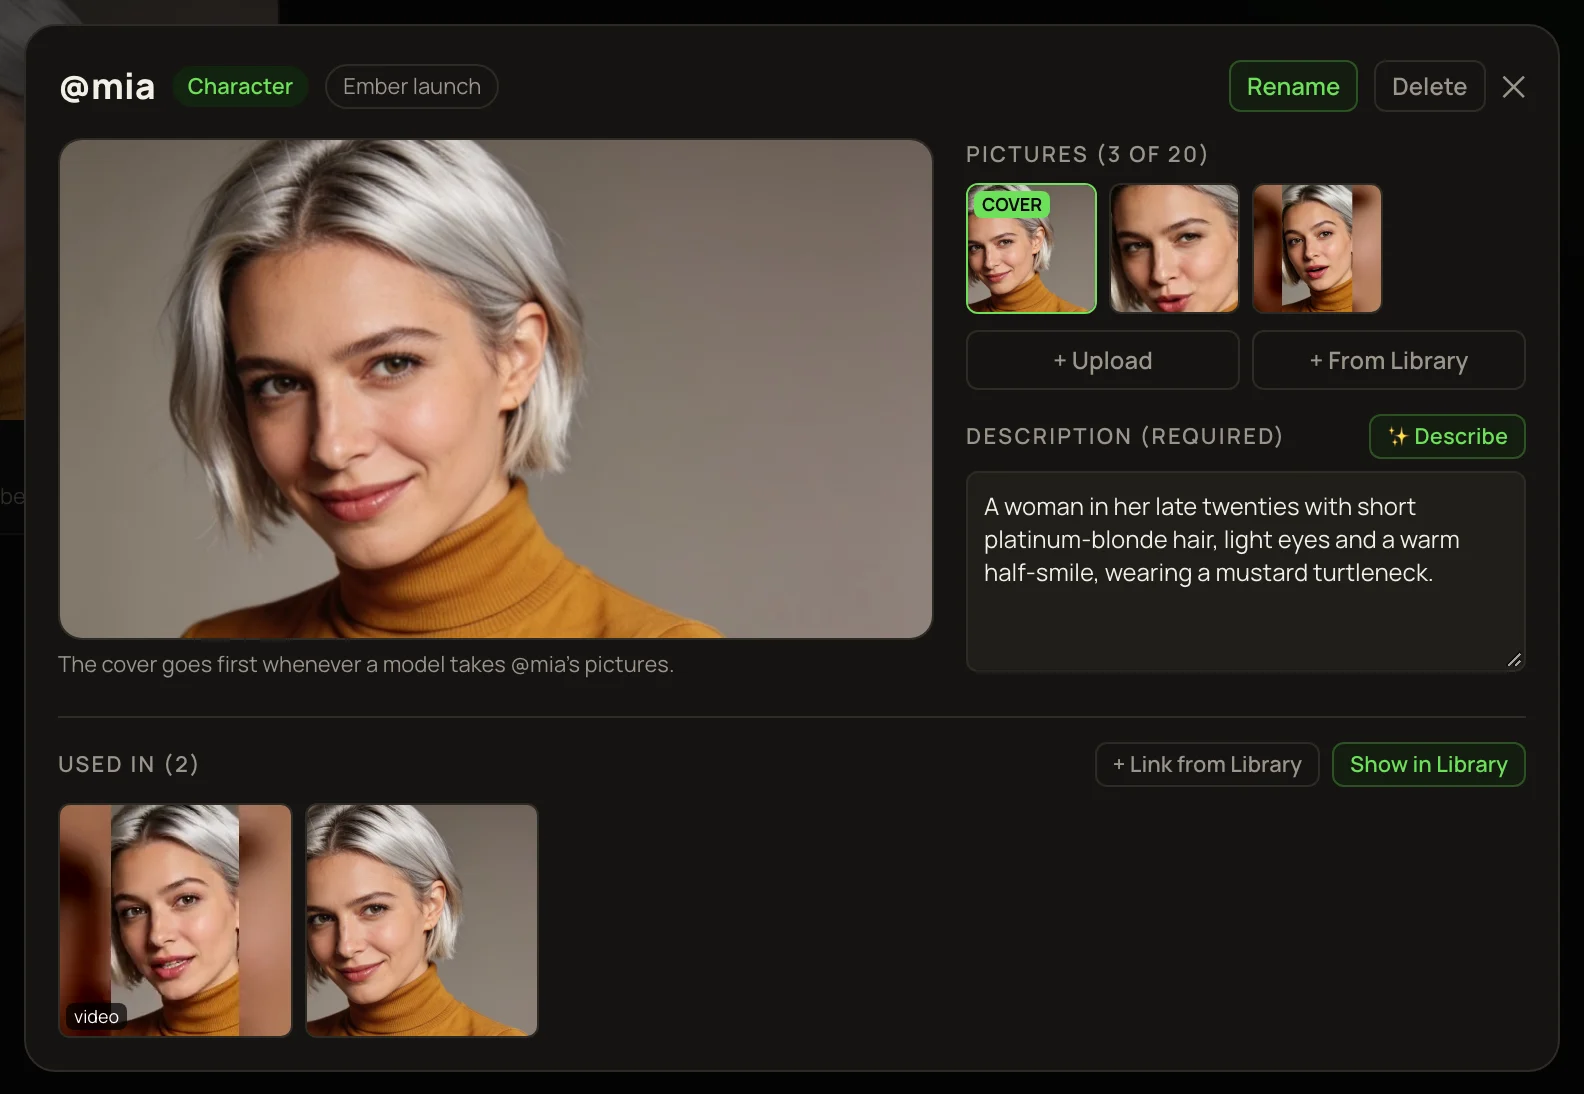
An entity is a name plus 1 to 20 reference pictures. Write its name in a prompt and the model copies it from those pictures — the same person, product or place, shot after shot. There are six kinds:
- Where
- Library → Entities in the left menu
- Pictures
- 1 to 20 each; the first is the cover
- Cost
- Free to make. Using one costs only the model’s normal price
- ✨ Describe
- Free: 3 a day on sign-up credits, 25 a day once you’ve bought credits
Make an entity
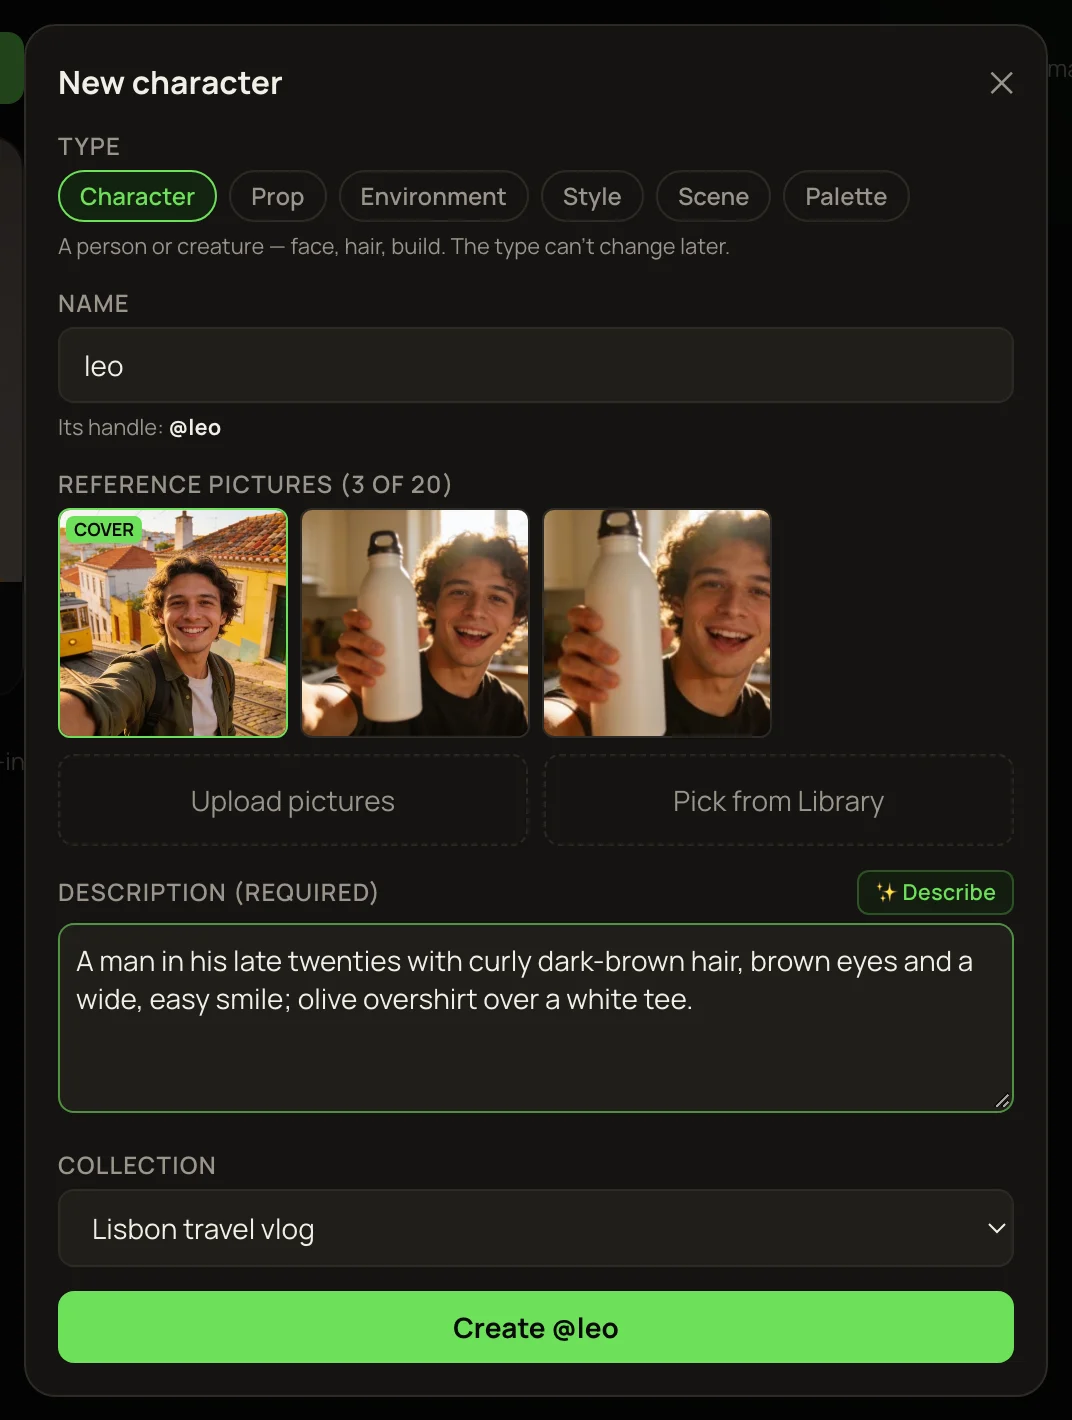
- 1Open Library and press the + beside Entities in the left menu. Or open one type, like Characters, and press + New character.
- 2Pick the type. It can’t change later.
- 3Type a name. It becomes the entity’s @handle — lowercase, with spaces turned into underscores. No two of your entities can share a handle.
- 4Add pictures with Upload pictures or Pick from Library. The first is the cover; point at another and press Make cover to swap.
- 5Write a description, or press ✨ Describe to have one written from the pictures. Characters need one; the other types can skip it.
- 6Optionally choose a Collection, then press Create @….
From pictures you already made
In the Library, press Make entity or style from pictures, tick the pictures, and press Make entity. The same window opens with them added.
From a Flow Reference box
Name the box, give it a picture, and press Save character. It’s saved as a character with no description, so add one before using it on a model that only reads words. Saving again under the same name adds the new picture to that character. If the flow belongs to a collection, the character joins it.
Make a colour palette
A palette keeps every picture and clip to your brand colours. It holds colours only — no pictures.
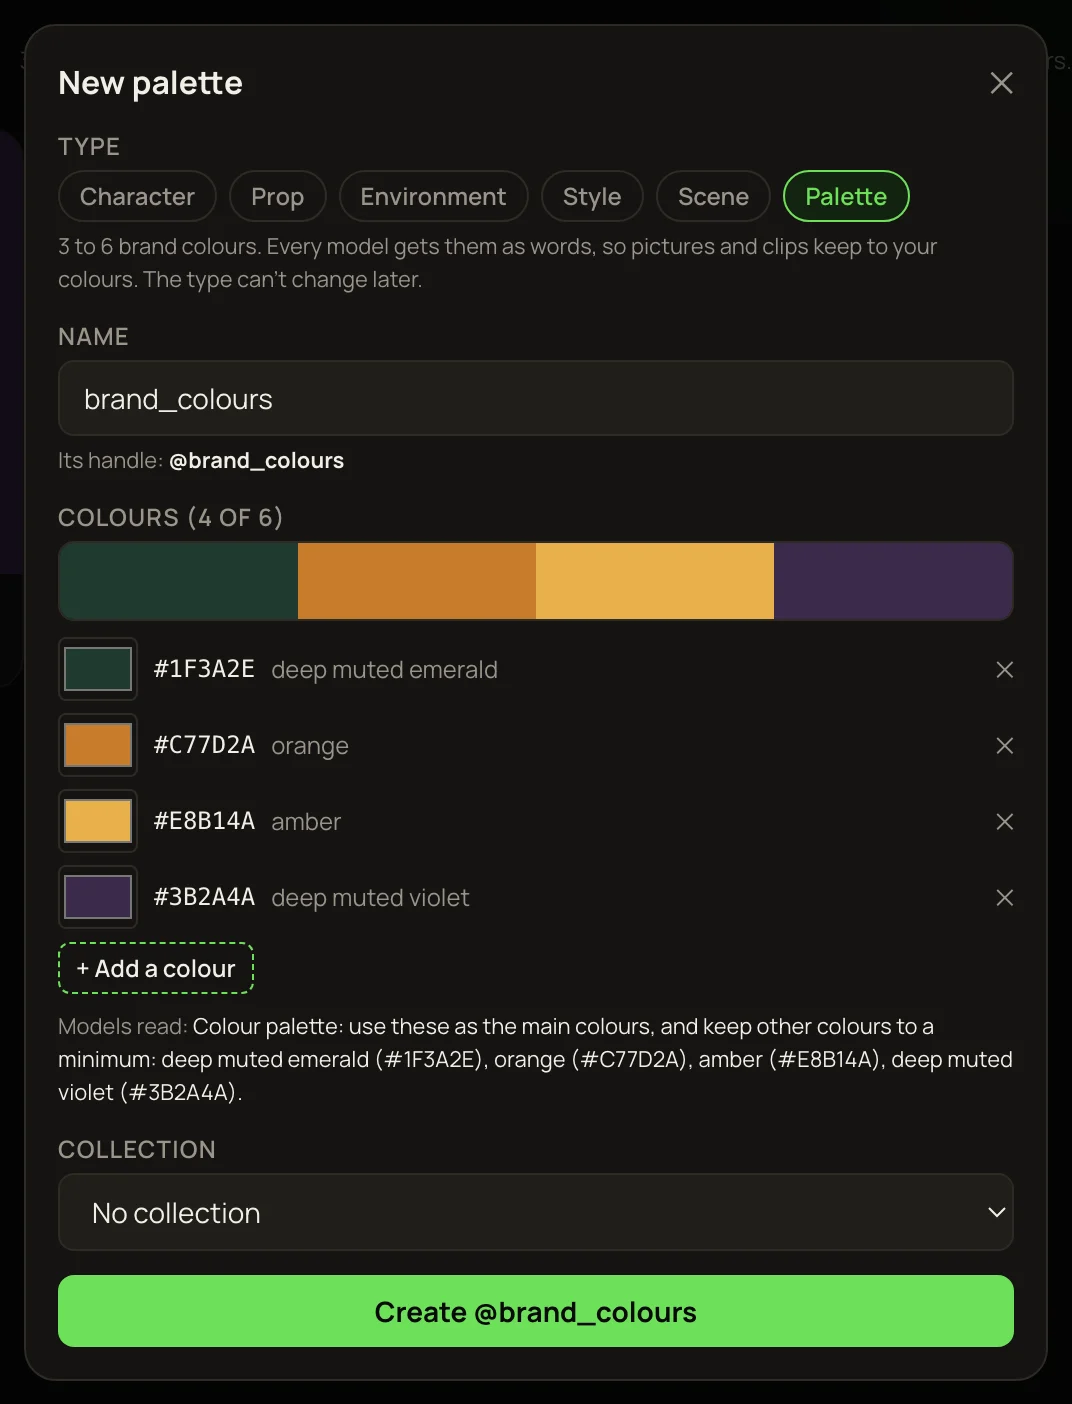
- 1In the left menu, open Library → Palettes and press + New palette.
- 2Name it. The name becomes its @handle, like @brand_colours.
- 3Pick 3 to 6 colours with the colour pickers. + Add a colour adds one and ✕ removes one. Each colour shows its name in words.
- 4Check the Models read: line — those are the exact words every model will get, like “deep teal (#0F766E)”.
- 5Press Create @brand_colours.
To use it, type @ in any prompt and pick it — the list shows its colours, and the line under the box says it sends its colours. In the Studio, 🎨 Style lists your palettes at the top; a palette is added next to a style, never instead of it. To change one later, open it, adjust the colours and press Save colours.
Use one in a prompt
Type @ in a prompt box in the Studio or on any Flow box, and pick from the list — for example “@mia walks into @resort-lobby, in the style of @graphic_novel”. A row of tags under the box shows what each entity sends to the model you picked:
Each model takes a limited number of pictures, counting your source photo: most take 6, Grok Imagine Edit takes 3, and Ideogram Character reads only 1. The pictures are shared out so each entity gets its cover first. When the limit runs out, the next entity goes in as its description — or is left out if it has none. The tags under the prompt tell you which.
Entities in video
Two video models build the whole clip from your entities’ pictures — no source photo needed. Pick one in the Video lane and name at least one entity in the prompt; without one, the run stops before you’re charged.
Built-in styles
The Styles page (in the left menu, under Recipes) has a shared set of ready-made looks, free for everyone. Search it, open a style to see its example pictures, and press Use this style — the Studio opens with “In the style of @…” in the prompt. You can also type the style’s @name in any prompt.
In the Studio, the 🎨 Style button under the prompt opens your own styles and the built-in ones. Picking one adds “in the style of @…”, replacing any style picked before. Built-in styles can’t be edited, but a style of your own with the same name takes their place for you.
Change or delete an entity
Click an entity to open it. From there you can:
solorender keeps its own copy of every entity picture, so deleting the original from your Library never breaks the entity.
Used in
Everything you make with an entity is linked to it. Open the entity to see the newest 48 pictures and clips it appeared in (the count shows “48+” when there are more). Show in Library filters your Library to them, and + Link from Library adds older work by hand. A linked creation is never sent to a model — only the entity’s own pictures are.