🏷 Crisp Upscale is 20% off — 2 credits instead of 2.5Try it•🏷 Creative Upscale is 20% off — 50 credits instead of 62.5Try it•🏷 Clarity Upscaler is 20% off — 6 credits a megapixel instead of 7.5Try it•🏷 Qwen Edit 2511 is 20% off — 6 credits instead of 7.5Try it•🏷 FLUX Erase is 20% off — 10 credits instead of 12.5Try it•🏷 Seedream 4.5 Edit is 20% off — 8 credits instead of 10Try it•🏷 Seedream 5 Flash Edit is 20% off — 6 credits instead of 7.5Try it•🏷 Nano Banana 2 Edit is 20% off — 16 credits instead of 20Try it•🏷 Nano Banana 2.1 Edit is 20% off — 10 credits instead of 12.5Try it•🏷 FLUX.2 Klein 9B Edit is 21% off — 5 credits instead of 6.3Try it•🏷 Ideogram Character is 20% off — 30 credits instead of 37.5Try it•🏷 GPT Image 2 Edit is 20% off — 43 credits instead of 53.8Try it•🏷 GPT Image 2.5 Flare Edit is 20% off — 11 credits instead of 13.8Try it•🏷 GPT Image 2.5 Sunburst Edit is 20% off — 11 credits instead of 13.8Try it•🏷 Meta Muse Edit is 20% off — 2 credits instead of 2.5Try it•🏷 Grok Imagine Edit is 21% off — 5 credits instead of 6.3Try it•🏷 Bria Expand is 20% off — 8 credits instead of 10Try it•🏷 Ideogram Reframe is 20% off — 12 credits instead of 15Try it•🏷 Topaz Video Upscale is 20% off — 4 credits a second instead of 5Try it•🏷 FLUX Video Upscale is 20% off — 28 credits a second instead of 35Try it•🏷 Grok Imagine Extend is 20% off — 20 credits a second instead of 25Try it•🏷 Lucy Edit Pro is 20% off — 30 credits a second instead of 37.5Try it•🏷 Kling O3 4K Edit is 20% off — 84 credits a second instead of 105Try it•🏷 Luma Modify is 20% off — 70 credits a second instead of 87.5Try it•✨ New: Nano Banana 2.1Try it•✨ New: Grok Video 1.5 LiteTry it•Credits never expire — whatever you buy rolls over foreverSee pricing•

Using an end frame

Add a second picture, and the clip moves from your first picture to it.

An end frame is a second picture showing where the motion should finish. The model animates from your Source image to it. It’s the surest way to make a clip go somewhere — a character crossing a room, a camera arriving at a door.
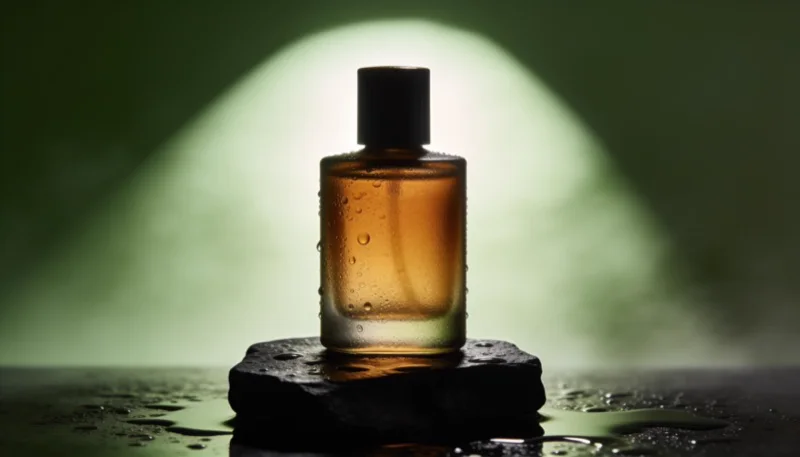
Start picture
A perfume bottle on a wet stone under a green spotlight.
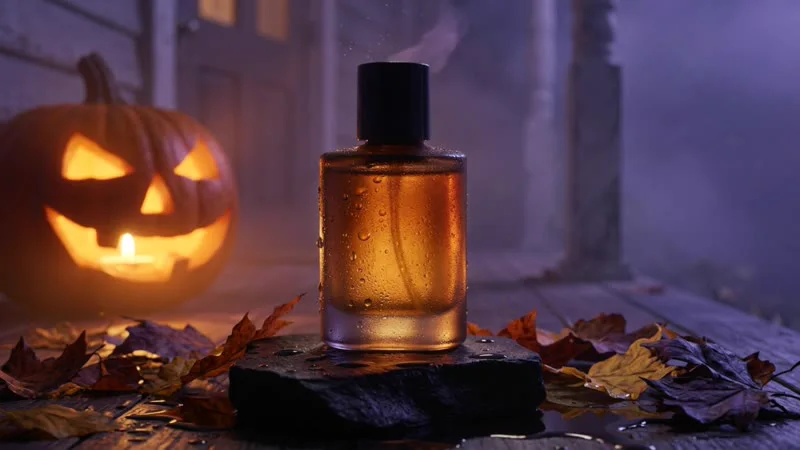
End frame
The same bottle on a stone at an autumn night, with a glowing pumpkin and fallen leaves.
Kling 2.5 Turbo Pro with both pictures: the clip starts on the first and lands on the second.

Add an end frame

  1. 1
    In the Video lane, open Model and pick a model that takes an end frame (see the list below). Auto doesn’t show the panel — pick Kling 2.5 Turbo Pro, the model Auto runs.
  2. 2
    Set your Source image. That’s the first frame.
  3. 3
    Under it, in End frame · optional, click Upload end frame or Library.
  4. 4
    In Prompt, describe the motion between the two. Then click Generate video.

To take the end frame off, click ✕ Remove. An end frame doesn’t change the price.
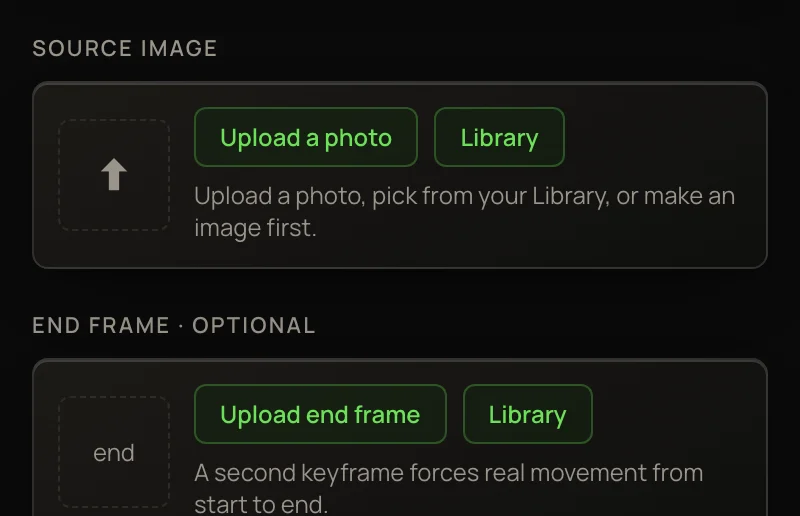
The Source image panel and, under it, the End frame · optional panel, each with Upload and Library buttons.

Why it helps

With one picture, a model often keeps the subject in place — it sways or drifts but doesn’t travel. A start and end pair fixes both ends of the shot, so the model has to carry the subject from one to the other.

Which models take one

Take an end frame
Kling 2.5 Turbo ProHailuo 02, Hailuo 02 Pro, Hailuo 2.3 FastSeedance 1.0 Pro, Seedance 2.5, Seedance 2.0H3, H3 Max, H3 Max TurboWan 3.0 PrimeGemini Omni Flash 1.1
Don't take one
AutoVeo 3.1, Veo 3.1 Fast, Veo 3.1 LiteKling v3 Turbo, Kling v3 Turbo Pro, Kling v3 Pro, Kling 2.6 Pro, Kling O1Grok Video 1.5 LitePixVerse V5Every Text→video and · Entities model

Switch to a model that doesn’t take one and the panel disappears. The end frame isn’t sent with that run.

Making a good pair

Make the start frame first. Then change it with words in the Edit lane: “same scene, she has reached the door”. An edit keeps the look of the first picture, so the two frames match. You can also upload both, or pick either from your Library.

✨ Direct · free reads both pictures when it writes the motion prompt. In Flow, the Animate box has an end (opt) socket on the same models — see Flow nodes explained.

More in Creating Images, Video & Audio

← Back to the Help Center